31 December 2015

The Blackmanes' Drop Pod & new posting schedule

Of all the vehicles in WH40k, Drop Pod is perhaps the least rewarding as a modelling and painting project, simply because of how static objects they are.
In the fluff, they are dropped from high orbit and accelerate the speed of their fall through the use of a huge thruster, until, through the use of a set of angled, smaller thrusters, they slow down abruptly. In an unusual show of realism from GW, only transhumans like the Astartes can use Drop Pods, because this rapid deceleration would kill normal humans.
Now, in game, you just place them on the field, where they stay until destroyed. Also, if I wanted, I could ally with the Imperial Guard and give them a Drop Pod, which they could use for a group of raw recruits who would be just fine until they'd be outside the pod and something looked at them funny.
 Because Ragnar Blackmane is my main warlord, I wanted to keep it fairly simple. I'm going to have to paint at least a few more of these, and getting too detailed would make that a pain. For once, GW's practice of using The Blackmane's badge as the standard actually works in my favour. I used plenty of black soot weathering powder to make the pod seem like it it has entered the atmosphere the hard way.
For the armament, I chose the Deathwind launcher. I wanted the drop pod to pose an actual risk to something on the battlefield, so that the opponent would have to either ignore it and take casualties, or divert some of their forces to dealing with it. Also, a dropped pack of ten men armed to the maximum can make a serious alpha strike, and the launcher can add to that.

In other news, this will be the last Thursday update for the time being. Starting next week, I will now post three times per week, to have more time to make bigger projects. I'll go more into it later. For now, Happy New Year!

29 December 2015

Luna Wolves Centurion

I managed to order one of the limited availability Horus Heresy Centurion models back when Forgeworld redid their webstore. It took me a while to decide what to do with it. Originally, I considered just gutting the poor guy for its parts, but as it turned out, the model wasn't constructed like the standard multi-part Space Marines, but had its legs and torso as a single piece, and the head and arms didn't have the standard connections, either. This somewhat limited its use as spare parts, and the model's decorations didn't exactly fit Space Wolves of 41st millennium, probably not the heresy era Rout either.
I figured I'd just paint the model as a member of another 30k army, finally deciding on Luna Wolves, at some point near the end of the Great Crusade, before Horus' daddy issues got the better of him (I like to.imagine an egyptologist somewhere reading this blog entry with growing confusion and irritation).
 One of the first things I noticed when painting the model was that painting black & white power armour is surprisingly difficult. My method of choice was painting the white parts with Dawnstone before heavily drybrushing them white. I had to paint the black parts black again afterwards, then re-drybrushing them, only lighter, but it worked... ok. It's not the cleanest paintjob I've done, but I accept it. I do like the stark contrast between black and white parts, so all in all, it's ok.
 The one thing I did with Green Stuff was painting the Luna Wolves Legion Symbol. It's not my cleanest sculpt, either, but considering it's supposed to be an ancient armour, damaged and repaired several times over, it sort of works.
I doubt I'll end up making any sizable Luna Wolves army. Maybe a small task force of somewhere around 500-750 points, that can be explained as a force lost in the Warp until reappearing when the Heresy was in full swing, but not large enough to fit in the 41st millennium history books.

27 December 2015

Space Hulk Brother Zael

Time for another Space Hulk miniature. Maybe I'll have finished the whole set by next Christmas, though I wouldn't bet on it, considering I have yet to start on the Genestealers.
 I have to admit that the models in the set are finely detailed and tend to have nice themes to them. Brother Zael has a whole bunch of various purity seals and oaths of the moment stuck to his armour, which gives the model character and adds to the narrative of the squad. It would have been easy to just give the model a heavy flamer and decide that's his thing, leaving the rest generic. Fortunately, that didn't happen.
 That said, the Crux Terminatus stones on the models in particular have pretty inconsistent texture quality to them. The standard plastic Space Marine Terminators and the Wolf Guard terminators have Crux Terminati that always end up getting fine definition from the normal shading and highlighting treatment, while this one ended up being blurry, no matter what I did. May well be that I should have done something differently, but my point is that with most Terminator models, I don't have to.
Brother Zael's right shoulder pad is among my favourites in the squads, with the white flame on the black background, behind a gem in the shape of a gemstone. It captures well both his own as well as his Chapter's iconography.
I used a mix of purple and blue shades and black soot weathering powder on the nozzle of the flamer to get the discolouration effect. It's surprisingly easy and a very effective trick to make the weapon seem like it's seen some use.

25 December 2015

Unidentified Wolf Lord, painted (Christmas Special, pt. 2)

I admit that "no-one knows" is something of a cop out for writing backgrounds for characters, but seeing how the Wolf Lords of the late 41st millennium are already canon, and I didn't want to start a fourth Great Company, a Wolf Lord outside the established Chapter was a necessity, and having one being general knowledge wouldn't really work, either.

I imagine the unknown, blood-soaked Astartes warlord in Space Wolves paraphernalia and with huge horns on his back being first spotted during Abaddon's 13th Black Crusade, appearing in several desperate battles to fight against the traitors. He's rumoured to be one of the 13th Great Company, though his Indomitus-pattern Terminator armour and markings from long after the Heresy speak against this theory. He's also rumoured to be one of the Jarls of the ill-fated Wolf Brothers, though his colour scheme is clearly that of the parent Chapter. He is said to somewhat resemble at least three different Wolf Lords who have vanished at various points in the Chapter's history.

Space Wolves haven't acknowledged the rumours of the unknown Jarl in any way, but according to accounts of those few non-Space Wolf Imperial troops who have fought by his side, his eyes appear to have no visible irises or pupils, suggesting blindness, yet he doesn't seem to suffer from this, and some claim to have heard him speak of his mission for the Allfather. Any tangible information is rare, as any witnesses have soon disappeared, rumoured to have been captured either by the Inquisition for questioning, or Space Wolves themselves, to prevent the Inquisition from learning too much.
I wanted to keep the theme of an amalgamation of Father Christmas, Saint Nicholas, Krampus and Yule Goat, so I painted the gauntlet parts of his weapons as well as the shoulder pads red. The extra redness was also the reason I wanted to use Blood for the Blood God on the model relatively liberally. The horns were drybrushed with Zandri Dust, then again with Ushabti Bone and finally with White Scar.
 I wanted the scarf (cassock? I don't know the terminology) to remind of Saint Nicholas, so I painted the Nauthiz rune on it, as it both vaguely resembles a cross and supposedly stands for approximately same sound as the letter N. The model's flesh was painted with Kislev Flesh, as I wanted his skin to be relatively pale.
This concludes this year's Christmas Special. Just as a heads up, I don't plan to make a special for every possible holiday -- I don't really have one planned for New Year, for example. Anyway, in case you missed it yesterday, Merry Christmas, Happy Hanukkah (though I think that was already? Anyway, hope it was happy), Joyous Kwanzaa (is that what you wish?) or just have a nice weekend!

24 December 2015

Unidentified Wolf Lord (Christmas Special, pt. 1)

So far, most of my HQ choices are special characters, and while it's nice to be able to field characters that already have a history, personality and general background, sometimes I want to have my own Wolf Lord that is not being written from Nottingham. I plan to write some actual background for the character tomorrow, but for now, let's just say Logan Grimnar's little sleigh of murder opened a door for this guy.
 The inspiration for the model came from the various myths and versions of Father Christmas AKA Santa Claus, mostly focusing on the Northern European Yuletide traditions, though there is a little Saint Nicholas in there, too (specifically the scarf, which can be seen in many depictions of the saint). I also added a subtle reference to Yule on his belt in the form of the small circle, symbolizing the sun, as is fitting for a celebration of the winter solstice.
 The most visible part of the model is clearly the horns, referencing more than a few Northern European traditions of Yule, such as Yule Goat in the Nordic Countries and Krampus in Germany. It took me a while to figure out how to add horns on a Space Wolf model without making him outright a Chaos worshipping renegade, until I simply decided they're a trophy taken from a Xenos creature he killed, presumably in hand-to-hand combat, as can be deduced from him having a Wolf Claw on his right hand...
...and a Chainfist on his left. I originally considered just giving the model a pair of Power Fists, but that would have been very inefficient use of points. I wasn't entirely happy with the thought of him having a pair of Wolf Claws either, so I went for an anti-infantry weapon on his right and an anti-armour for his left hand. They are both Special Weapons, so he gets +1 A, and is able to counter a variety of threats.
I'll cover the model's narrative side in Part 2 of the Christmas Special. For now, merry Christmas if you celebrate it, happy holidays if you have time off and have a nice day if you're working!

22 December 2015

Wolf Guard with Wolf Claws

If you look at the title, you can see one of the problems people tend to have with Space Wolves, and I can't really say I disagree. GW has done great work to bring the Viking mythology to the millenniums 30, 41 and those in between, yet when they name things or try to come up with motifs for the Rout, they always go wolf this or wolf that.
As for the model this post is about, I have actually already shown it once, though the paintwork has been somewhat touched up since.
 I'm still relatively satisfied with the red hair and beard I painted on the model the first time around, and didn't do anything to those. Instead, I painted the wolf claws to be consistent with those on my (later) Terminator models, Void Claws to be specific. I also made the shades deeper and the highlights brighter, as the original paintjob was really rather messy and mild.
 The yellow on the left shoulderpad is really fragile, and when I added the shade between the rim and the pad, the result wasn't as neat as I hoped. Not a disaster, just could be better. The original model is actually old enough to feature what I used to think of as my Wolf Guard shoulder pad, with the knotwork-decorated wolf's head.
The last thing I added was the gem on the right gauntlet. I used a mix of greens and blues, instead of just using the same colours as I tend to use on the Wolf Claws and Frost Blades.
The pack marking on this model is not used anywhere else in my army, at least not yet. I originally made him to be the leader of a 15-man Blood Claw pack, though I'm not sure I'd want to invest that many points in one model, especially since a unit that size would need a Land Raider Crusader or a Stormwolf, and a Wolf Priest to make the pack Fearless and a little bit harder to kill. Seeing that the Wolf Priest would have an AP4 weapon standard, a Power Fist might make more sense for the pack leader. Will have to think on that, or maybe make several alternative models of this same guy. Would help me decide what to do with all those duplicate heads, at least.

20 December 2015

Skitarius Vanguard Alpha, painted

The Kataphron models inspired me to continue my AdMech army further. The high points cost of pretty much all of the Cult Mechanicus models means I won't have to have as many Skitarii models, amking the clone trooper syndrome less of a problem. They'll still remain a secondary army, though.
 The first major decision to make with the Alpha was the armament. After some thought, I chose the Arc Pistol / Arc Mace combination, for vehicle hunting. I wanted to have most of my Vanguard to be either firing their weapons or running forward. The arc pistol arm was posed rather awkwardly so that he'd necessarily have it either in the movie poster style by his head (pointless, since you can see the weapon and the model's head simultaneously anyway) or just hanging around, so having him firing wasn't an option. The mace arm was also posed less than optimally so that it points nearly straight to the side. Works fine, if you have your Alpha standing around and pointing, but since I wanted him to be running, the finished pose would necessarily look a little awkward. At least I managed to fit him with a pair of legs that is currently lifting the right knee, so that having the left arm straight looked at least a little bit more natural.
I paint the electric blue glow on the arc weaponry with thinned-down Temple Guard Blue. I try to paint the crevaces in the weaponry, but am not overtly worried about accuracy, as some slight smudges just reinforce the glow effect.
 I generally try to use the colour of steel or iron for anything that looks like it needs to be durable, and the copper or bronze for the more decorative parts or stuff that look like they need to conduct electricity. The coat's Mars colours are just Evil Sunz Scarlet drybrush over Mephiston Red shaded with Nuln Oil and Carrowburg Crimson.

18 December 2015

Thoughts on Basing and Posing

Basing miniatures is often considered separate from posing them. It's often done as something like an afterthought, where you try to come up with something to avoid just having the base left blank. While I, too, often just base my models to tie them further in with the rest of my army, sometimes I take the base into account already at the posing stage.
 One of the more basic techniques is to simply put the model on uneven ground. This is a simple method of making the model seem more dynamic and realistic, since 41st millennium wars generally don't take place on golf courses. It also serves to make some of GW's standard leg poses seem more natural and give a reason to why the model's legs are in such an extreme position.
 This also works with less humanoid models, as can be seen with this WIP shot of Kataphron Destroyer. These models have very posable waists and left shoulders, and this pose takes advantage of this.
Another way to make the base and the model interact can be seen on this older shot of Thunderwolf Cavalry, where I added rough terrain and a corpse over it to the space the mount seems to be going around. Again, this makes the model seem a little more interesting.
Conveying movement is important in a combat pose, but that can sometimes be a little tricky, even with posable multipart miniatures. Here, I chose a wolf cloak from the older Space Wolf Accessories sprue that GW sold until fairly recently, because it's flaring to the appropriate direction relatively to the movement I'm trying to convey on this Wolf Guard. I imagined him dropping down to his left knee from the left, while simultaneously slashing with both of his Wolf Claws. His cloak would trail behind him while he twists to his right.

17 December 2015

Arjac's Shieldbrothers' Pack Leader (WIP)

I believe that the key to having a really great-looking army is to take no shortcuts. While it's very natural to want to put more effort in the character models at the expense of the rest of the miniatures in the units, giving each one real attention will result in an army you can be proud of.
All that said, I still find myself giving the character models more attention than the rest, especially when it comes to characters in centrepiece units like Thunderwolf Cavalry, Void Claws or, in this case, Arjac's Shieldbrothers.
Now, some of the missing details in this model may be slightly more obvious than others. Glossing over the lack of face, which in this case has nothing to do with the model being shamed for something, I still plan to add some sort of fur apron or something similar to the legs. Also, the bare left leg may or may not get some extra decoration.
 I like to think that the Shieldbrothers each have their Thunder Hammers customized to fit best their individual fighting style. In this case, I imagine the axe blade being used more for hooking action than offending, catching the attacker's weapon right after blocking the attack with the shield, leaving them open for a counterattack (as represented by the formation's rules).
The most labour-intensive part of the model has (so far) been the bionic left leg. I decided that I wanted it to have a lupine shape to it, instead of the more standard ones. It confers no additional abilities, but the high quality is included in the bonuses the model gets from being a part of the Great Wolf's Wolf Guard.
The model's base will be further detailed before painting. If nothing else, I have to use cork to get the bottom of the model's left foot in contact with ground.

15 December 2015

Kataphron Destroyer Battle Servitor, painted

I decided it was time to nudge my Adeptus Mechanicus army forward a little bit, and started with a solid core of rock-hard Troops choices (or at least one Troop choice, I haven't actually decided if the next one will be a unit of Kataphron Breachers or a Dominus).
 I built the models according to the instructions, without really adding anything. The models are so full of details, there really isn't much space for aftermarket green stuff customisation, yet so small that connecting LEDs or other electronics doesn't really seem practical.
What I did like about the models is that since their guns and waists aren't fixed, they can be posed much more freely than the Skitarii models, for example.
 I also followed the 'Eavy Metal teams Mars colour scheme pretty exactly, even though I feel like that's something of a mistake, since inviting comparison with professional painters is not something I like to do.
One thing I did do clearly differently was to trace the edges of the model's skin areas with Carrowburg Crimson (yup, the differences are that small) I wanted to make the contact surfaces between the skin and the metal look raw and unhealthy. After all, the servitors are just tools to be used, and I can only assume the organic parts can be recycled with frightening ease.
Since the Cult Mechanicus Codex included a canonical Mars marking guide, I followed that, too, and used the transfers from the kit to give the servitor individual marking (How individual will it be, if there's only one transfer sheet and I may have dozens of Kataphrons? Gotta learn to freehand these) and the Forgeworld icon.

13 December 2015

Grey Hunter of the Redmaws, painted

Slowly, I keep going through my Grey Hunters and finishing them. This one is a rather unsung hero, with no special ranged or assault weapons. Of course, in the fluff, he'd still single-handedly kill a squad of unaugmented soldiers and wouldn't even need his bolter to do it.
 I took the models head from Wolf Guard Terminators kit. Since I have something of a policy to not use a bare head I haven't sculpted on a Terminator model, each box gives me a few more heads for my Grey Hunters (Blood Claws not so much, since I prefer them to not have beards). To further identify him, I painted some runic tattoos on his temples. 
 I make a point of putting at least some sort of individual markings on each model's battle helmet, even if the model is not currently wearing it. Narratively, the model wouldn't want to not be recognised making a saga-worthy kill just because the enemy used chemical weapons strong enough to bother Astartes physique.
I try to remember to give each Grey Hunter a bolt pistol, a close combat weapon and a bolter, or the weapons used to replace any of those. Most often, this means a holstered bolt pistol, and I'm currently thinking about ordering a pack of those from Forgeworld.


11 December 2015

Arjac's Shieldbrothers' Land Raider Crusader, painted

This is another model I had mostly finished earlier, and now just touched up the paintwork and varnished. I originally started to work on the model quite a while ago, and this can be seen in certain places, as far as quality of the work is concerned.
 I sculpted the decoration on the front hatch out of Green Stuff. Unfortunately, the sculpt wasn't terribly clean -- a problem that was exasperated by using the final gasps of a spray bottle in a warm weather for the primer coat. This led to the final sculpt collecting a little too much of the washes in its recesses, making the highlights stick out a little more than I'd like. It's not a disaster, but I wish it could have been better. The somewhat rough finish of the decoration called for some weathering on the front ramp. I used rough pieces of sponge to apply some Leadbelcher over the ramp.
 The Wolf that Stalks the Stars was painted freehand just today. I found the thought of painting it a little intimidating, even though I knew that the symbol wouldn't be visible from both sides at once, so perfect symmetry wasn't absolutely necessary. As it is, I think the symbol fits the model well enough.
Decorating a large model like a Land Raider in a suitably Space Wolfy fashion is demanding, but pretty fun. I ended up using a lot of pieces from the Stormwolf/Stormfang kit, such as the decorative chains and shields that I don't think work that well on an aircraft model. I also added some wolf skulls that I glued over the headlights and painted in bronze colour.
 The rear of the model is left pretty much undecorated. In hindsight (no pun intended), having some kind of decorative elements behind the model would have been cool, but it is as it is.
 The left side door had a plastic Space Wolfy bit from the dreadnought kit IIRC. I also sculpted a small Crux Terminatus between a set of bronzed rows of teeth. Again, this was made of Green Stuff, but the finish turned out significantly better than on the front door.
The meltagunner has the Iron Priest torso and head from the Stormwolf/-fang set, but the rest of the gunner comes from the standard Land Raider kit.
 I felt like the top of the model needed some flavour, and after a lot of deliberation, I decided on a loose knotwork pattern. It could have been cleaner, too, but it's not really even close to what I'd call bad.
 I magnetized the side doors so that the insides could (and should) be painted. The small magnets I used can be seen in picture, as I had already painted most of the hull when I came up with the idea. I think the naked magnet look actually works pretty well here, though.
I also painted the insides of the crew compartment. To achieve that, I simply painted the insides of the model before the final assembly, so that both sides of the track and side assembly,floor and the upper part of the model were painted, as well as the assault ramp and the front door.

Now that my Land Raider is finished, the only things to finish of Arjac's Shieldbrothers are the Pack Leader and Arjac himself (canonically, pretty much the same thing, but in terms of rules, a Wolf Guard Termnator pack must have at least two models and a pack leader).

10 December 2015

Green Stuff Essentials

Getting started with GS can be difficult. The stuff seems to stick to everything except where you want it to, and I like to say that it needs to be persuaded to take any given shape, rather than simply told to. I plan to add an actual tutorial here later on, where I show how to make a (preferably beginner-friendly) project, but I thought I'd start with a simple post about what you need to get started.
Let's start with the obvious, the material itself. There's a good chance you've previously bought some from Games Workshop, which comes in small blue and yellow strips. I don't do that anymore. It is a lot more expensive bought that way, but that's not the reason (truth be told, you'd have to really use the stuff a lot for that to make a difference), but the fact that the two components touch in the middle. This leads to the middle part hardening, which in turn leads to inconsistent, lumpy putty. You may have to do some hunting to purchase GS in bars, but knowing the manufacturer's name (Polymer Systems Inc.) and the product's official name (Kneadadite Blue/Yellow Epoxy Putty) will get you far.
 You can do some sculpting by just using your fingers, but not really anything very detailed. Sculpting tools come in variety of shapes, and the "best" one is largely a matter of preference and habit. Pictured are two bought miniature sculpting tools and one that I made myself out of two sewing needles, a little wood and Green Stuff. The one in the middle is by far my favourite that I use for most of my sculpting. The one made of needles comes in handy when nudging the corners of a model's eyes into shape and other precise tasks. The bottom one is in the picture pretty much just to show that they come in that shape, too. There's nothing particularly wrong with that shape, though, I'm just far more used to the middle one.
Whichever tool you need, make sure you dip it in water, lick it or maybe use a sponge first. A dry tool will stick to the putty, making sculpting unnecessarily frustrating.
A miniature drill and a hobby knife are pretty much essential for modelling, but they have their uses in sculpting as well. The drill comes in handy when you're attaching a head sculpted at the head of a toothpick to the armature or when adding a top knot to a model's head, for example. Basically, whenever you want to expand a model substantially enough to need an armature, the drill comes in handy.
The hobby knife is there for when you will inevitably make a mistake and need to cut off the failed part and redo it. In some cases, you need to use pliers and/or sidecutters instead of or in addition to the knife, depending on the size and location of the part being worked on and if you need to redo the armature as well.
 Speaking of armatures, you'll want to have a variety of different thicknesses of wire. Pictured are 0.4 mm copper wire and 0.7 mm and 1 mm steel wires. These suffice for most situations, although I sometimes use 1.5 mm steel wire for some of the larger pieces. Choose wire thin enough for your purposes; you can always add more Green Stuff around the wire to give it extra support, but if you chose too thick a wire, the final piece will be too thick, too.
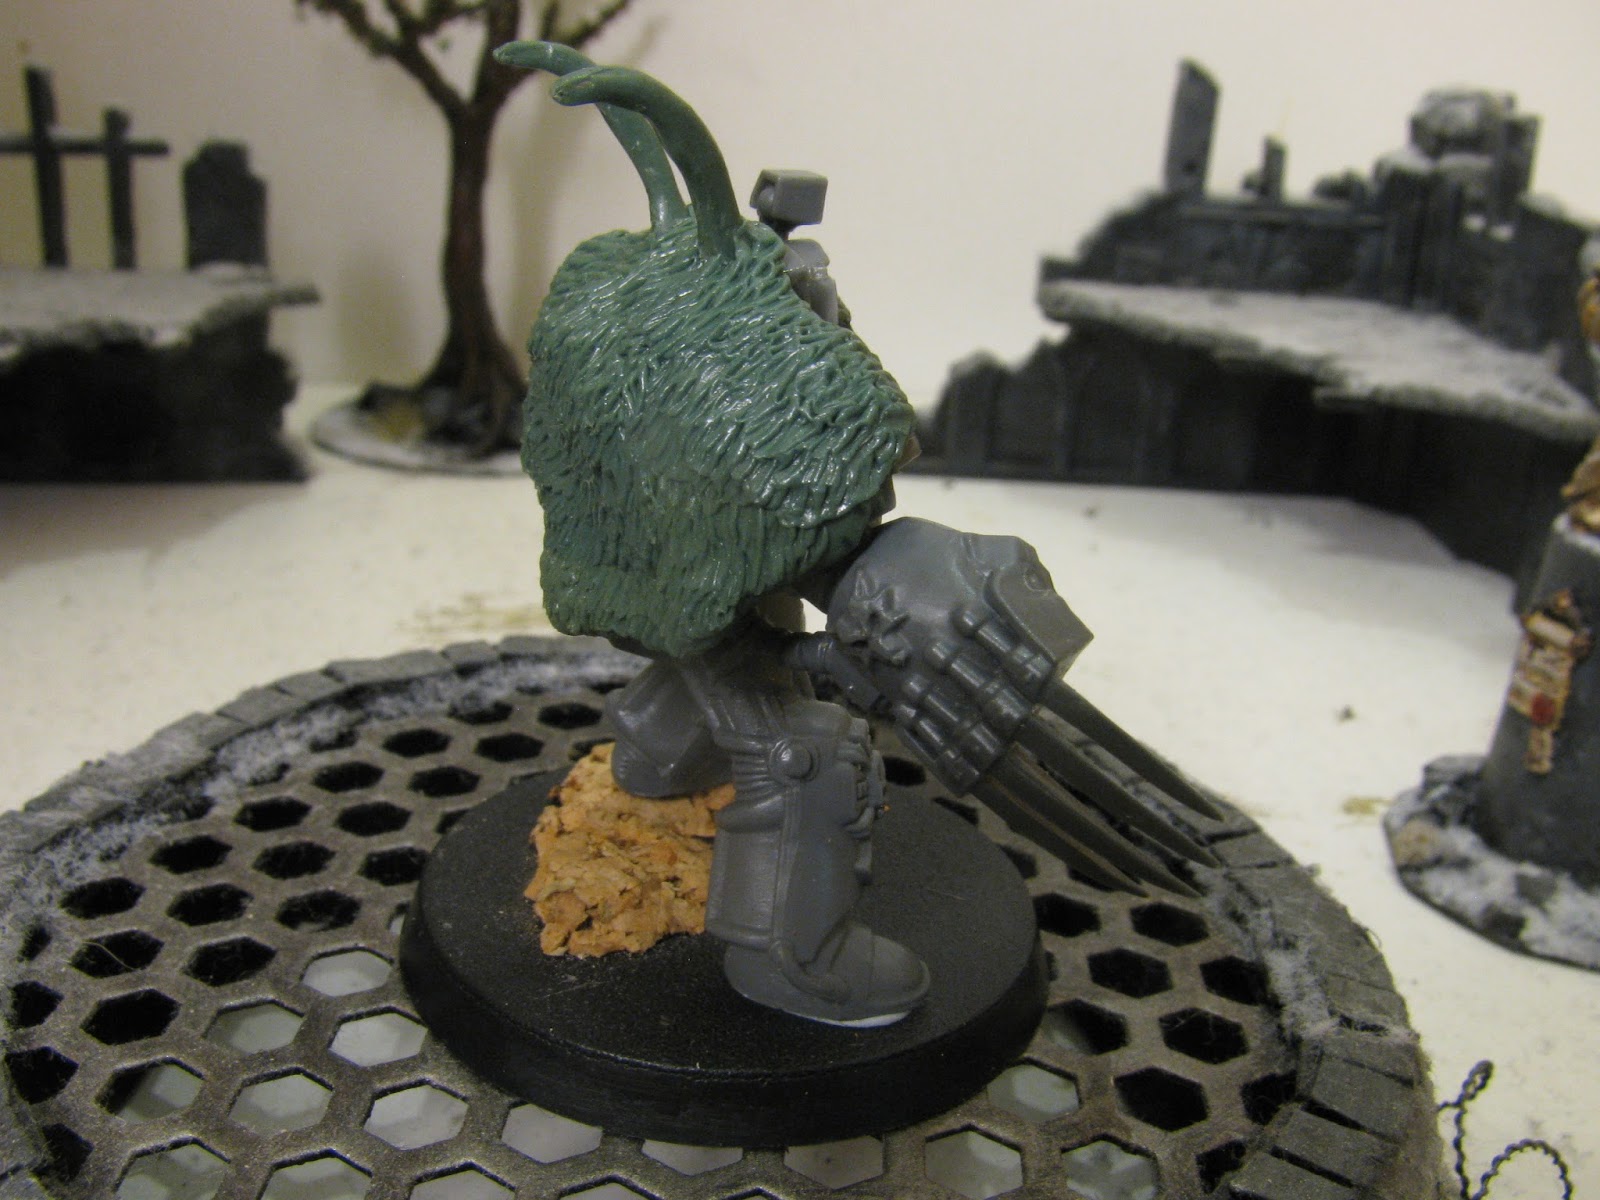
Cork is very useful material for basing. For sculpting, I generally use it to hold the piece being worked on. In this case, it's a work in progress shot of a head at the end of a toothpick. Triangular toothpicks are often pretty useful for using as armatures for smaller pieces. Unlike wire, they can easily be whittled thinner as necessary, and the fact that they're angular and won't bend makes them easier to hold comfortably..

One final piece of equipment I find very useful, if not absolutely necessary, is a miniature oven. Green Stuff cures faster in higher temperatures. However, if the heat gets too high, not only does it cause a fire risk, but the Green Stuff piece may distort and even start to bubble, obviously making a mockery of any fine detail you worked so hard to sculpt on it. When in doubt, the safe bet is to use less heat rather than more.
There are a several different methods for achieving the optimal curing temperature. I used to have a lamp with a 40 W light bulb right over a metal jar, until EU regulations made finding normal 40 W bulbs uncertain at best. Currently, I use the same metal jar lightly covered with a piece of aluminium foil on a coffee maker's heatplate. The piece being worked on doesn't directly touch the metal jar, but is being held at the end of a length of wire or a toothpick.
Whichever method you choose, pay attention to fire safety. Keep the heat source well away from any flammable painting chemicals (white spirit, acetone etc.) you may have around. Have a smoke alarm in the room you're working in, and a small fire extinguisher wouldn't hurt, either.

Hope this helps someone to get started. I'll try and think of an appropriate difficulty level project for a more detailed tutorial at some point later on. 

8 December 2015

Space Hulk Brothe Valencio, painted

Antoher Space Hulk Terminator, this time Brother Valencio with his chainfist. I should point out that I may not yet be completely finished with painting this one, and will definitely at least varnish the model.
 I find that the red and white colour scheme of the model's right shoulder pad catches the eye very well, and meshes nicely with the gold of the decorations. Although I don't necessarily try to paint each model to look exactly as they do in the back of the Missions book, there are relatively few places to depart from that scheme. In this model's case, I did paint his chainfist's fingers and chainblade casing black instead of red. Shocking, I know.
 The devil is in the details, as they say, and I make a point of trying to paint at least something eyecatching in the models. In this case, that job went to the black and yellow cabling connecting the model's helmet to his armour.
Rear view of the model reveals many of the places I find should be touched up a little before varnishing. Back of the model's legs could use some more highlighting, and the metal colour is inconsistent in quite a few places. I may append this entry once I'm really done with the model, depending when that will be.

6 December 2015

Thunderwolf Cavalry with a Bionic Arm. painted

This post could easily have an alternative title, called "A long series of  small, but annoying and avoidable mistakes". I should know better than to try to paint while tired, but then again, knowing the smart thing to do and then doing a different thing altogether is something I almost take perverse pride in.
I made some adjustments to the model since the last post about it, the most noticeable of which is the wolftail plume on the rider's helmet. Generally speaking, once I have made a post on a model, the final sculpt is done, unless I specifically mention otherwise, but in this case, I simply wasn't satisfied with the stock Mk. V helmet.
 The grooves on the rider's legs posed a dilemma for me. Usually, I keep my models' legs in the standard Space Wolves grey scheme, but the markings clearly invited a more intricate colour scheme. Since the Thunderwolf Cavalry are supposed to be the inner circle of the Wolf Lord's retinue, I decided to go for the black and yellow Wolf Guard marking colour. Together with the shoulder pad, this gave the model's left side a lot of character.
In hindsight, I'm not so sure the Gjermundby-influenced helmets on the mounts were such a great idea. Having Space Wolves' doggies wearing their own space viking helmets just may be a little too adorable for what they're supposed to be. It doesn't bother me enough to try to modify them at this point, but I think I will look towards historical horse barding for influences regarding Thunderwolves' armour plating in the future.
 The Storm Shield is a good example of a completely avoidable mistake. I started painting it yellow with a black wolf's head, despite knowing full well how poorly bluish runes work on yellow background. By the time I came to my senses, the rune engravings on the shield were pretty much clogged, and I had to find an alternate method of signaling that the shield is powered. It works, and I did get the chance to try out using white together with Temple Guard Blue, but I'd still prefer to just have glowing runes.
For the chainaxe (which represents just a normal close combat weapon, albeit with Rending), I painted some simple knotwork on it to make it stand out a little
The base is my by now usual model, with cork pieces, grass tufts and modelling snow to give it some character.

It looks like this model's 60 mm base was the final straw that forces me to expand my miniature shelf with some plexiglass or something similar. Of course, that will lead to me havin more room on the shelf, motivating me to build and paint more, thus filling the shelf, forcing me to build new plexiglass levels etc...
What I'm saying is, no end of models in sight. That said, I have some posts planned in the future that may not involve a model showcase. No details at this point, though.